One of the reasons that lead me to finally get a Synology NAS was that i needed a simple and reliable way to solve the chaotic photo situation i had going on, all of my and my family’s photos were spread over multiple hard drives and other mediums, scattered in unorganized random folders, to put it simply, they were all over the place.
I was looking for a solution that is reliable, easily maintainable, and that would allow me to neatly organize all of my photos in a single place, something that has fine-grained control over photo access permissions with a user system, and with an intuitive enough user interface that my tech-illiterate family members could have easy access to our photos.
Out of all the other options i looked at, like Plex and PhotoPrism, Synology Photo checked almost all of those boxes.
I took all of the photos from the many hard drives i collected over the years, wrote a script to organize them in a predictable folder structure based on the photo’s metadata (i went with a simple [year]/[month]/[day] structure) and proceeded to dump them all on the NAS
Only one thing left to do: separate my private photos from the ones i want to share with my family’s account, i though this would be simple enough, i just organize the photos in albums and then move the albums to the desired location (user’s personal space or shared space), bam, done!
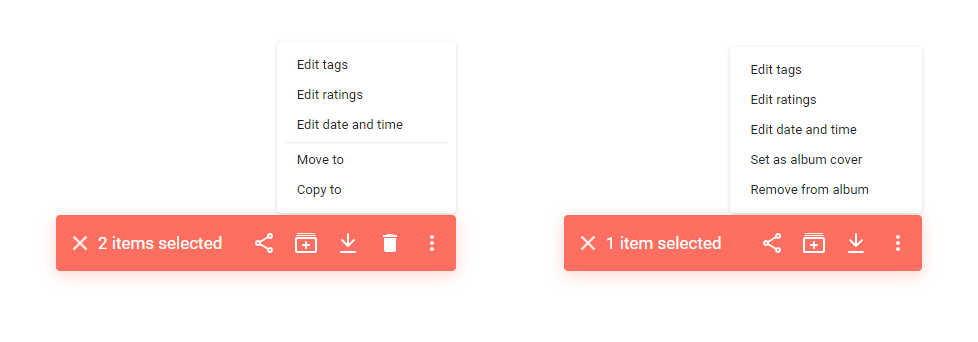
Sadly, as it turns out, the Synology Photo’s web interface and application allow you to move a selection of photos from personal space to shared space only if the selection is made from the timeline or folder view, the option is not available in the album views! Also, moving photos this way wouldn’t preserve the folder structure i made as all the files are moved to the same folder, what a bummer!

Timeline view selection on the left, Album view selection on the right
So let the tinkering begin! In order to move the albums we have to gain access to the Synology Photo’s internal database, query the contents of the album, and then use a script to move the contents automatically to the desired destination
Accessing Synology DSM internal databases
Several of Synology DSM’s services, like Download Station and Synology Photo, run on PostgreSQL databases, there are two main ways to access the data stored in these databases:
- Dump the whole database to file with
pg_dumpthen copy and inspect the dump locally (for this, i suggest following this thread) - Gain access to the internal PostgreSQL server running in DSM and query the database directly
In this guide I’ll show you how to access the database directly, let’s begin!
Gaining access to the internal PostgreSQL server
-
If you haven’t done so already, enable SSH on your Synology NAS by going in Control Panel → Terminal & SNMP → Terminal → Enable SSH service
-
If the firewall is enabled, make sure to open PostgreSQL default port 5432 (TCP)
-
Using the SSH terminal, add this line
host all all [Your computer IP address]/32 trustto file/etc/postgresql/pg_hba.confIf your user doesn’t have the necessary permissions to perform this action, runsudo su - postgresIt should look something like this:# TYPE DATABASE USER ADDRESS METHOD local all postgres peer map=pg_root local all all peer host all all 192.168.1.101/32 trust -
In
/etc/postgresql/postgresql.conf, set this parameterlisten_addresses = '*' -
Restart the PostgreSQL server with
pg_ctl -m fast restart -
Check for errors with
tail -f /var/log/postgresql.log
If everything went well, you should now be able to access the PostgreSQL database with your favorite client! JetBrains DataGrip worked best for me
Exporting Synology Photo albums
All that’s left to do is to query the database and extract the album’s photos, I’m going to use JetBrains DataGrip in the following steps, but any other Postgres capable client should be fairly similar
-
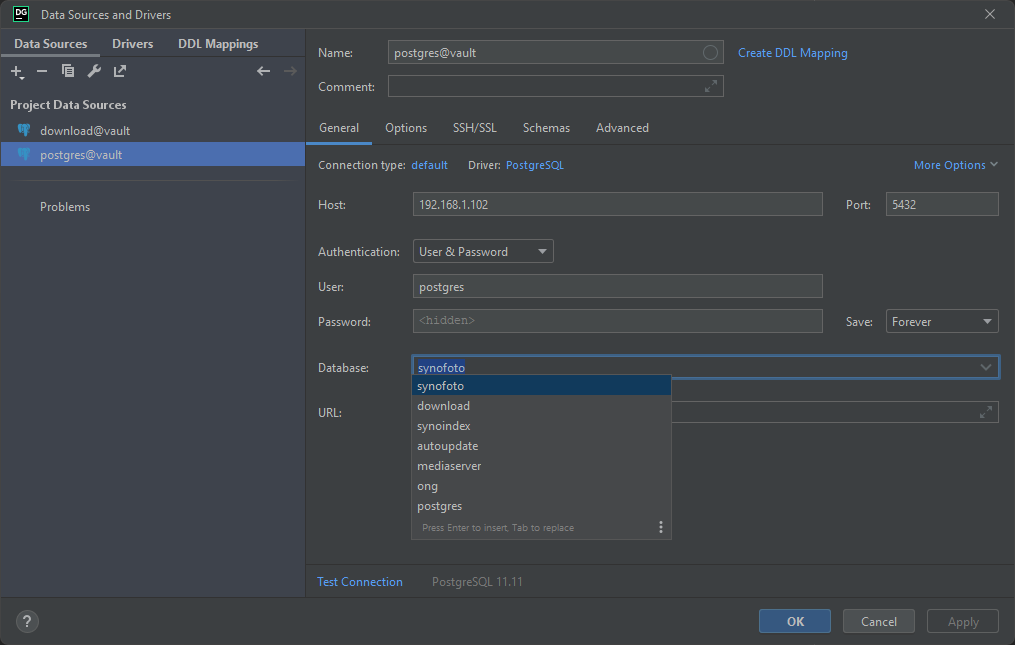
In the Database Explorer add a new PostgreSQL Data Source and set these parameters Host: [your Synology NAS IP address]
Authentication: User & Password
User: postgres
Password: [leave blank]
Database: synofoto
 Test the connection and hit Apply
 -
In the data source you just created, navigate to synofoto → public → tables, you’ll see the list of all the tables in the Synology Photo database
-
Run this query to list every element in every album
SELECT a.id, a.name as albumName, r.id_item, u.filename, f.name as dirName, CONCAT(f.name,'/', u.filename) as path FROM public.normal_album AS a JOIN many_item_has_many_normal_album AS r ON a.id = r.id_normal_album JOIN unit AS u ON r.id_item = u.id JOIN folder AS f ON u.id_folder = f.id; -
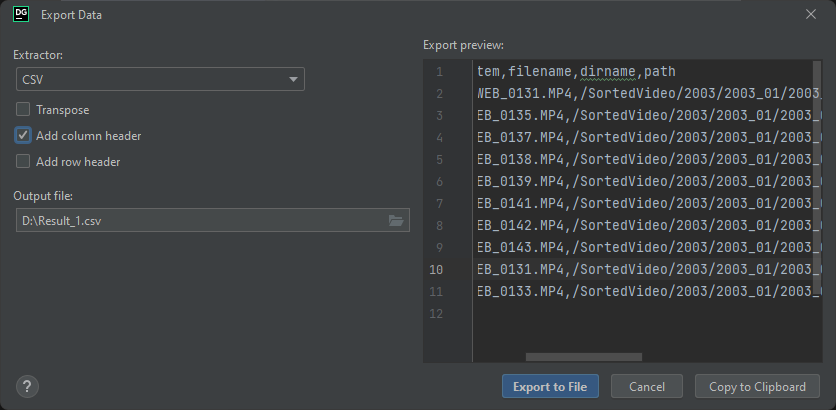
You can now export the query result to CSV file! Remember to add column headers, you will need them for your script later

-
In my case, i went for a PowerShell script that reads this CSV file and moves the photos and videos to a new destination
$data = Import-Csv -Path "[...]"
$basepath = "[...]"
$dest = "[...]"

$data.Where{$_.albumname -eq '[...]'} | ForEach-Object {
    $fullpath = Join-Path -Path $basepath -ChildPath $_.path
    Write-Output $fullpath
    if (Test-Path -Path $fullpath){
        $destPath = Join-Path -Path $dest -ChildPath $_.path
        $destDirectory = Split-Path $destPath

        if (!(Test-Path $destDirectory)) {
            New-Item -ItemType Directory -Force -Path $destDirectory
        }

        Write-Output "--> $destPath"
        Move-Item -Path $fullpath -Destination $destPath -WarningAction Inquire -ErrorAction Inquire
    }
}